
Hey there! Ever thought what happens when a bottle is squeezed or stacked, or when the weight of a hundred other bottles falls on it? It's one of those things we hardly think about when we reach for a PET bottle off the shelf. But believe me, there is much more that happens behind the scenes-particularly when it comes to ensuring those bottles don't buckle under pressure, quite literally!
This is where top load testing comes in. Among the most crucial quality control steps that manufacturers take to ensure their PET bottles can sustain the weight and pressure they will be subjected to during storage and transport is top load testing. Knowing top load testing is your secret weapon if you're into packaging or bottling. I am going to take you through the process, tips, and methods that will help you ace this.
Why Top Load Testing Matters?
Think of it, a case of bottles piled atop of each other in some warehouse or in transit. Every bottle supports the weight of many others above it, and your PET bottles could be flattened at the bottom. That is not good news for your products and customers. And that's where top load testing saves the day.
Top load testing, in its nature, is a stress test. It tries to emulate the force a bottle experiences under conditions of stacking or compression. What is it looking for? To witness the pressure the bottle can support before deforming or falling. It ensures that your bottles are strong enough to withstand the rough journey from factory to shelf.
Top Load Testing Process
Yeah, the process does sound technical, but think about this: you are giving your bottle some mini workout to look at the strength of it. Now, let me break this down.
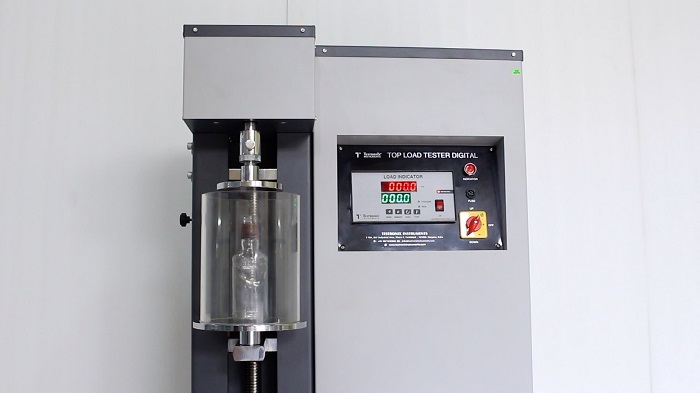
Preparation of the Bottle: You start by putting the PET bottle into a top load testing machine. Now, this is one kind of mechanical press that will apply pressure on the bottle slowly.
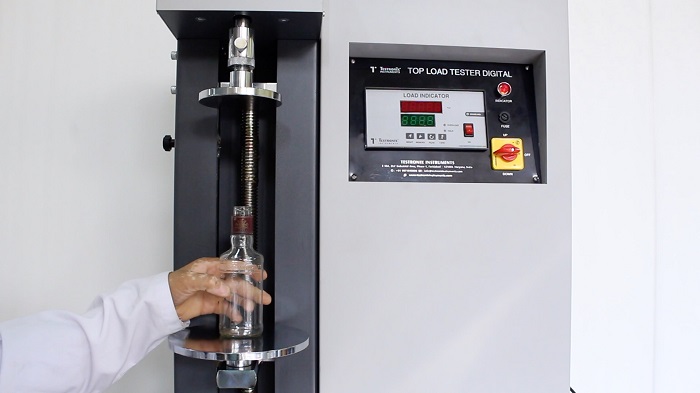
Force Application: And here comes the real test. The machine starts to apply progressive force to the top of the bottle, sort of like an invisible hand pressuring it to see how it would react.
Measurement: The machine measures the amount of force applied and records the instance when the bottle deforms. This deformation can be slight indentation or a full-blown collapse, depending on how strong the bottle is.
Analysis: After the test, you get data that shows you exactly how much load your bottle can handle; you will know whether it is good to go or whether you need to adjust your design or material.
Sounds pretty easy, right? But there's an art to it-to understand when enough is enough, and what interpretation of the results will be.
Tips to Carry out Effective Top Load Testing
You simply do not want to test your bottles, you want to test them well. So, here are some tips that can help you get the best out of your top load tests:
1. Test a Sample Size:
But do not just test a bottle or two; that is not going to give you any indication of what your total bottle strength is. Test a decent sample size to get a good average. If your sample size is too small, then you could very well miss the hidden weaknesses in the production run.
2. Uniformity Check:
Make sure all your bottles are of the same design and material. The slight defect in its shape or its material will offset your results. Be consistent.
3. Don't Forget the Cap:
The cap plays a big role in how the bottle will perform under top load pressure. A poor cap or fit may cause the bottle to prematurely fail. Always test your bottles with the cap on for more realistic results.
4. Use Realistic Conditions:
Replicate real-world conditions your bottles will endure. Will they be stacked high onto pallets? Are they going to sit in warm temperatures within a warehouse? Attempt to simulate these conditions during a test for the most accurate results.
5. Review and Adapt:
Testing is not a one-and-done affair. You will want to continually test your bottles and refine your design as needed. If you find that your bottles collapse with too little pressure, you may have to adjust the thickness of the plastic or refine the shape.

Real-World Example: A PET Bottle Saves the Day
Picture it when I say, you own a beverage company, and just introduced a new line of sparkling water to the market. The bottles look swell, but without top load testing, you don't know they are too weak for the pressure of stacking during shipping. Your first shipment goes out, and the customer calls back with the nightmare report, half the bottles are crushed, and the product is unsellable.
If only you'd run a proper top load test! You might have then found that weakness early and your brand would not have suffered embarrassment or financial loss. A good top load test gives you confidence to send the product out, knowing it will make the journey to your customer intact.
LET’S KNOW MORE!
Is top load testing only for beverage bottles?
Not really! In general, any product using PET bottles—be it cosmetic, food, or chemical—can undergo top load testing.
Why is top load testing so important for PET bottles?
Top load testing ensures that your bottles are able to bear the pressure they will go through during stacking, shipping, and storage. Without it, you have a real chance of facing the worst scenario, there's nothing worse than having damaged products and dissatisfied customers.
How frequent are the top load tests I need to run?
Generally speaking, top load tests should be conducted as often as possible, especially when you have different bottle designs, materials, or new production runs.

