Reviewed by Anurag Mishra (Sr. Technical Consultant)

Get ready! You're about to enter the world of tensile testing, using a Universal Testing Machine. Trust me, it's an exciting journey to understand the material strengths, flexibility, and general behavior under stress. But, prior to mastering one, let us first go step-by-step to make sure that you are well-prepped to conduct a tensile test like a real pro. Ready? Let's go!
First things first, before getting into the how-to, here's a bit of the basic concept: tensile testing is stretching materials until they break. But why do we do such a test? The answer is, to provide crucial insight into tensile strength, elongation, and parameters of elasticity. Basically, it's just like you're trying to figure out how far your rubber band can stretch, before snapping, only on an advanced level.
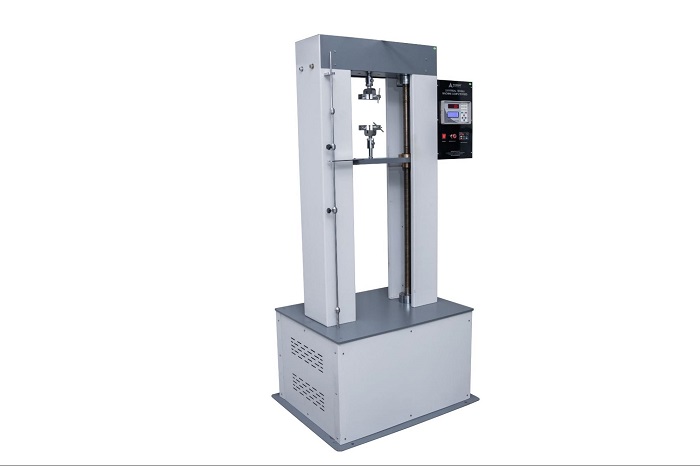
Time to meet the genuine "superstar", which is the Universal Testing Machine, or UTM, for short. Different tests, for example, pliable and pressure tests, alongside other mechanical tests, can be led, on a huge assortment of materials, similar to metals, plastics, materials, and even composites. Pretty versatile, right?

Step 1:
Setting Up the Universal Testing Machine
Get your UTM ready for action—here is what you do:
Power up the machine.
Calibrate the Machine:
Follow the manufacturer's guidelines to go through the procedure of calibrating a load cell. This allows the force measurement capacity so that the machine has the ability.
Mount Specimen
(a) Grips hold the test specimen while the test is being run. There are wedge grips, pneumatic grips, and vice grips, depending on the material. Make sure you use the correct set of grips for your specimen.
(b) Mount at the middle of the grips of your material test specimen. This is very important as it eliminates potential uneven stress distribution. The grip tightening shall be performed tightly to prevent the specimen from slipping during the test.
Step 2:
Inputting Test Parameters
Now that your machine is ready, let us discuss the test setup.
Select Test Mode
(a) UTM has various test modes. Choose "Tension" mode when testing for tension. This mode aims to draw the specimen in tension.
Now, adjust the Gauge Length:
(b) Gauge length represents the length of a test specimen where deformation measurement is taken. The control system of the machine is fed in the gauge length. The gauge is usually the distance between the grips at the beginning of the test.
Define Testing Speed
It is the speed at which the machine pulls the specimen. Typical speeds can range from 1 to 10 mm/min, although this can vary.
Step 3:
Running the Tensile Test
Everything is in place, and it's time to rock 'n' roll! The following steps describe running the tensile test:
(a) Start the Test
Hit the "Start" button on the control panel or software interface. At this moment, the UTM will begin pulling the specimen at the predetermined speed.
(b) Monitor the Test
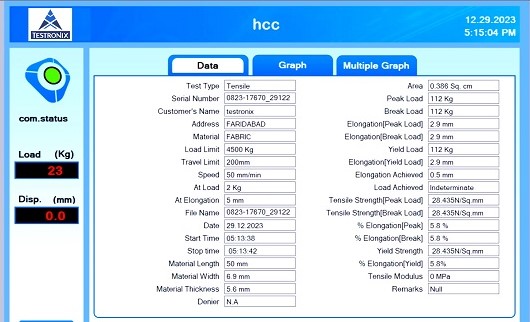
Finally, the watchword is to look at the machine and specimen carefully during testing; the UTM display will give you real-time data of the applied forces, lengthening, and tensile stress-strain curves. In case of anything unusual, you can halt the test to be able to edit some parameters.
(c) Look Out for the Point of Rupture
Ultimately, the breaking point is that at which a material ruptures or breaks. Of course, the machine automatically stops after the specimen breaks, but it's really interesting to see the development of the stress-strain curve right before it does that!
(d) Tabulate the Data
After the test is completed, the UTM will report back the test results including ultimate tensile strength, yield strength elongation at break, and much more. You will want to save these results and/or print them for analysis.
Step 4:
Analyzing the Results
After successfully running the tensile test, it's time for the data analysis. Here’s what you need to look for:
(a) UTS or Ultimate Testing Strength
The highest stress level that a material can endure, before breaking, is UTS.
(b) Yield strength
It is the amount of stress beyond which the material will not return to its original shape.
(c) Stress-Strain Curve
It represents the graph that shows the material response from the application of stress.

QUESTIONS POOL!
Absolutely! Apart from tensile tests, the UTMs can perform compression, bending, shear, and even peel tests. All of that depends on the grips and fixtures one is using, making the UTM truly a multitasker in material testing.
Yes, the monitoring during the test is good; however, the machine stops automatically once the specimen breaks. Sometimes it can be seen that due to monitoring, one can identify problems at an early stage.
Yes, most of the UTMs do support storing test data in a computer or any other storage device for further analysis.
STAY CONNECTED FOR MORE.
Contact Information:
Phone: +91 9313 140 140
Email: info@testronixinstruments.com
Website: Testronixinstruments.com