Reviewed by Anurag Mishra (Sr. Technical Consultant)

Okay, let's get down to bright business—literally! You're staring right at a UV weathering test chamber, and you likely want to know, "Where do I even begin?" Worry not; it's far more accessible than you imagine. Think of it like a tanning bed for materials—but instead of a beach-ready glow, we're talking about protection from the ravages of time and sunlight. Ready? Let's dive into this walk-through. Don't worry about sunglasses; it's going to be a bright ride.
First things first: your test specimen. Are you testing plastic? Paint? Coatings? Choose your poison! Make sure the material to be treated is clean, dry and free of surface contaminants like oil or dust. Remember we want UV rays hitting the material, not some mystery grime. Patience is a virtue here—clean those samples as well as a chef would prepare a fine dish.
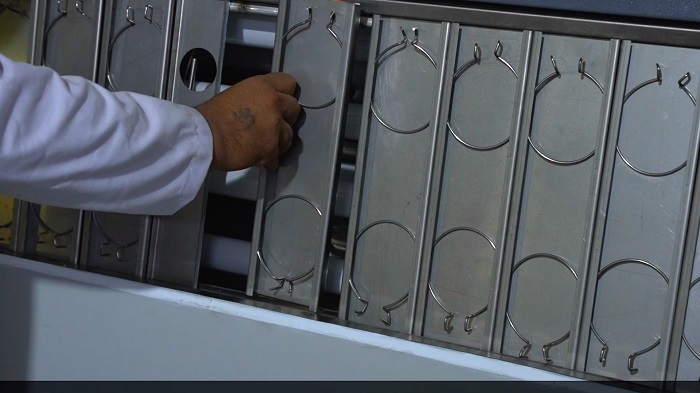
Put the prepared samples into the UV chamber once that is done. Fine, that sounds technical, but positioning is crucial. Get them right in order inside the chamber, as anything too tilted may lead to uneven exposure and only skewed results - not what you want, right?
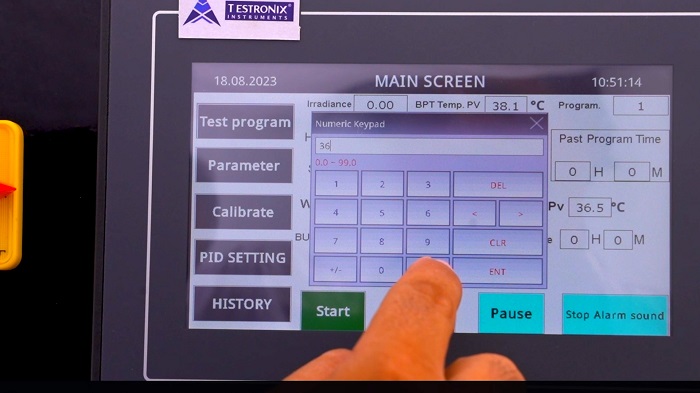
Now, let's get down to the good stuff - messing around with control settings! You've got to put in some parameters: UV light strength, temperature, and humidity levels. If that sounds like dialing in a "recipe" for your test, well, that's basically what you're doing. Since materials will vary, many tests are a simulation of sunlight in two ways, either through UV light or moisture cycles.
Your faithful UV weathering chamber probably has options to vary the wavelength of light, typically in the UV-A or UV-B range, which simulates sunlight. Always follow any relevant standards (for example, ASTM or ISO) that apply to your material; this way, you can ensure that your results are meaningful and comparable.

And here's the moment of truth! Everything is set, it is time to start it all going. And the sooner you click that magic "go" button, the sooner your materials will start their UV workout. It feels almost like waiting for a long time, but this process is more exciting than watching paint dry—it's actually making sure paint does not dry too soon, crack too early, or fade too fast.
Depending on the test, you might be simulating hours, days, or even years of sunlight exposure in just a few hours. Fast-forwarding time like this is the magic of accelerated weathering.
While the chamber is working its magic with the UV, make sure to keep an eye on things. You may want to pop out to grab a cup of coffee and leave the chamber to its devices heaven knows you deserve it but checking in occasionally will definitely help you ensure that everything runs as planned. Keep an eye on temperature, light intensity, and any cycles of moisture.
A baker wouldn't bake a cake and just leave it in the oven, never checking on it. You have to do that too. Either the sun hits too intensely or too much rain falls, and things may get a little "overcooked."

Finally, your test is done and you will now measure the damage--or, hopefully, lack of damage. When you remove your samples from the UV weathering chamber compare them to unexposed samples. What do you notice? Fading? Cracking? Discoloration?
Remember to document all the data. You can use pictures of some processes, colorimetric readings, or even mechanical strength tests in order to quantify how much UV your sample can handle before it starts degrading. Think of this as your "post-mortem" analysis, giving you the information you need to adjust the formula or materials for better longevity.
And voilà! You just completed your UV weathering test – years of environmental wear in only a little time! Consider the UV weathering chamber as your own personal time machine – one that doesn't require a DeLorean but still gives you the power to see into your material's future.
So whether you're testing coatings, plastics, textiles, or anything else that suns itself out, you now have it all under your belt to give your UV weathering chamber a run for the money. Remember: clean it, calibrate it, monitor it, and you're off to analyze and predict results that will help shine bright for the very life of your product.
FAQs
The duration of your test depends on the material as well as the test standards that you are going to undertake. Typical tests range from 500 to 1000 hours, simulating months to years of outdoor exposure. If you're looking for a faster result, simply use increased UV intensity - but really, it is all about trying to simulate reality as closely as possible.
It is stronger. It has a longer wavelength and is weaker. UV-A tends to cause slow, steady degradation, which is less intense than UV-B. UV-B light is more intense and simulates the harsher effects of shorter wavelength sunlight. Both are important for different materials depending on how they degrade in sunlight.
Absolutely! Most chambers alternate between exposure to UV light and moisture - whether it be through water sprays or condensation. This best simulates outdoor conditions in that the materials are exposed to not just sunlight, but to rain, humidity, and dew.